

![Image [1]-Veg-tan Process Explained: How Rawhide Becomes Thick, Durable Leather Using Natural Tannins in a 21-Step Journey from Rawhide to Finished Product-Nleather](https://www.nleather.com/wp-content/uploads/2026/05/image-23-1024x763.png "– Nleather")
The leather used in leather crafts is originally animal fur. But if animal fur is used directly, it will quickly rot. Therefore, only fur that can be used as leather is treated with preservation, and this process is called “tanning.”
Common tanning methods can be roughly divided into vegetable tanning, where the fur is soaked in tannins, and chrome tanning, which uses trivalent chromium for preservation. Although chrome tanning, which can produce large quantities of fur in a short time, is currently the mainstream in the market.
The biggest feature of vegetable tanning is that it requires complex steps and a relatively long time. Starting from the original fur, it takes about three months or more to complete. However, because vegetable tanning can make full use of the natural characteristics of the leather itself, and the resulting leather is thicker and tougher, it is denser than leather made by other tanning methods. Therefore, saddle leather often used to make Knight series leather products is mostly made from vegetable-tanned leather.
1.Raw hide
Freshly skinned fur is soaked in salt locally, and when transported back to Japan, the furry side (the outer skin) must be placed downward. This ensures the skin is not damaged during long transport periods. For short-distance domestic transport, the fur is usually placed face up.
The imported ones are male steers called Steer cow leather 。 Because uncastrated bulls known as ‘Bull’ usually have thick and coarse hides, making them unsuitable for leather crafts. The white leather on the left in the photo is pigskin, mainly used for making shoes. The leather on the left is obtained from domestically produced Holstein bulls and heifers that have been castrated. The preservation treatment of domestic and imported furs also differs.
![Image [2]-Veg-tan Process Explained: How Rawhide Becomes Thick, Durable Leather Using Natural Tannins in a 21-Step Journey from Rawhide to Finished Product-Nleather](https://www.nleather.com/wp-content/uploads/2026/05/image-24-1024x709.png "– Nleather")
2.Rinse with water
Since fur usually sticks to excrement or dirt, the first step is to wash off the dirt with water, then place the raw pelt into a large drum, add detergent, and wash together.
![Image [3]-Veg-tan Process Explained: How Rawhide Becomes Thick, Durable Leather Using Natural Tannins in a 21-Step Journey from Rawhide to Finished Product-Nleather](https://www.nleather.com/wp-content/uploads/2026/05/image-25-1024x720.png "– Nleather")
3.Cut in half
After washing, the fur is back to its freshly peeled state. At this point, you can cut the fur in half along the spine of the back. After the cut, the leather is more efficient to handle afterward. Additionally, if there is some excess fat stuck to the head area, you can remove it all at this time.
![Image [4]-Veg-tan Process Explained: How Rawhide Becomes Thick, Durable Leather Using Natural Tannins in a 21-Step Journey from Rawhide to Finished Product-Nleather](https://www.nleather.com/wp-content/uploads/2026/05/image-26-683x1024.png "– Nleather")
4.Soak in lime and remove hair
The fur cut from the seal is tied to the head and hips with rope, then soaked in lime to remove the hair. It is soaked alternately for one day in five tanks: the water tank, the water sulfurization tank, and the lime tank, which takes about a week to remove the hair. Each trough can hold 75 half-cut pellets cow leather (A total of 150 tablets), besides hair removal, it can also remove excess fat and relax collagen and fibers in the leather; the medication in the trough needs to be replenished daily.
![Image [5]-Veg-tan Process Explained: How Rawhide Becomes Thick, Durable Leather Using Natural Tannins in a 21-Step Journey from Rawhide to Finished Product-Nleather](https://www.nleather.com/wp-content/uploads/2026/05/image-27-1024x639.png "– Nleather")
5.Organize
After depilation, some sticking will appear in the inner layers. At this point, you can use rollers to remove excess fat. Since some leather has been soaked in lime beforehand to maintain its elasticity, you need to adjust the thickness of the leather at this stage.
![Image [6]-Veg-tan Process Explained: How Rawhide Becomes Thick, Durable Leather Using Natural Tannins in a 21-Step Journey from Rawhide to Finished Product-Nleather](https://www.nleather.com/wp-content/uploads/2026/05/image-28-1024x763.png "– Nleather")
6.De-de-lime and fermentation
De-ashing and fermentation refer to the process of placing hot water and a small amount of agent into a tank called Haspel, then placing the suspended leather for washing. This process neutralizes the lime on the leather and smooths the surface (also known as the soaking tanning method). After this step, the tanning process proceeds more smoothly. Each slot can hold about 60 pieces of leather.
![Image [7]-Veg-tan Process Explained: How Rawhide Becomes Thick, Durable Leather Using Natural Tannins in a 21-Step Journey from Rawhide to Finished Product-Nleather](https://www.nleather.com/wp-content/uploads/2026/05/image-29-834x1024.png "– Nleather")
7.Plant tanning
The key to the quality of the finished leather lies in the tanning process. After dissolving in hot water, plant tannin sap is placed into 160 grid vats, each with a different tannin concentration. The leather is soaked starting from the lowest concentration trough and progressing to the higher concentration.
It takes about one to one and a half months for tannins to fully penetrate the inner layers of the leather. Depending on the type of leather, the degree of tannin penetration will vary. For leather types that are less likely to absorb tannins, there’s no need to repeat the process—just spend a bit more time soaking.
![Image [8]-Veg-tan Process Explained: How Rawhide Becomes Thick, Durable Leather Using Natural Tannins in a 21-Step Journey from Rawhide to Finished Product-Nleather](https://www.nleather.com/wp-content/uploads/2026/05/image-30-1024x852.png "– Nleather")
Additionally, the season can also affect the tanning process. Wave generators are installed at both ends of the troughs to allow tannins to penetrate the leather more easily. When the tanning process is nearly complete, the leather is placed back into a low-concentration tank to expel excess tannins and avoid sedimentation marks. By the time this process is complete, the fur has already transformed into leather from the base.
Tannin sap, a type of plant called Mimosa, must be continuously added daily during tanning. Tannins are powdered when ingested, so they must be dissolved in hot water before being poured into the tannin tank. If the tannin tank is not kept within a certain temperature, the tannin will solidify, so every morning, the temperature and pH value inside the tank must be checked.
8.Dehydration
After removing the leather that has soaked in the denim tank, it is washed again. Then, the excess moisture is squeezed out by a roller dehydrator. When the leather passes through the machine, it is forcefully squeezed and returns to the shape shown in the illustration.
![Image [9]-Veg-tan Process Explained: How Rawhide Becomes Thick, Durable Leather Using Natural Tannins in a 21-Step Journey from Rawhide to Finished Product-Nleather](https://www.nleather.com/wp-content/uploads/2026/05/image-31-1024x757.png "– Nleather")
9.Add fat
If tanned leather is only pressurized by a roller dehydrator, it will become dry and prone to cracking. Therefore, the leather is placed inside the roller and grease is added. Although the rolling time varies depending on the thickness of the leather and the climate, after adding pure cod oil, it continues rolling for about 40 minutes. One roller can hold about 35 pieces of leather.
![Image [10]-Veg-tan Process Explained: How Rawhide Becomes Thick, Durable Leather Using Natural Tannins in a 21-Step Journey from Rawhide to Finished Product-Nleather](/wp-content/uploads/2026/05/image-32.png)
10. First extension
Leather treated with roller grease tends to shrink to some extent. Therefore, an extender must be used to stretch the shrinking leather. The extender is divided into primary and secondary stretching; after the first stretch, the leather enters the drying stage.
![Image [11]-Veg-tan Process Explained: How Rawhide Becomes Thick, Durable Leather Using Natural Tannins in a 21-Step Journey from Rawhide to Finished Product-Nleather](/wp-content/uploads/2026/05/image-33.png)
11.Deodorizing
After the first stretching, the leather is hung up to dry naturally. It takes at least 6 hours, usually hanging all day. This stage is also called “deodorization.” Depending on the leather, it may be steamed for 6 hours after hanging. The rod used to support the leather is called a gongzi rod, which can lift 70 pieces of leather at a time, totaling about 420 pieces a day, which is quite a demanding task. If there are unwanted parts of the leather, they are usually removed at this stage.
![Image [12]-Veg-tan Process Explained: How Rawhide Becomes Thick, Durable Leather Using Natural Tannins in a 21-Step Journey from Rawhide to Finished Product-Nleather](/wp-content/uploads/2026/05/image-34.png)
12.Finished product
After removing the odor, the next step is the second stretching. The second stretch is at the Sukugawara factory, which specializes in leather drying. After the second stretch, the leather is propped up piece by piece for shade drying. The picture shows the leather after drying. The leather dried at this stage (vegetable-tanned leather) is sold as a finished product.
![Image [13]-Veg-tan Process Explained: How Rawhide Becomes Thick, Durable Leather Using Natural Tannins in a 21-Step Journey from Rawhide to Finished Product-Nleather](/wp-content/uploads/2026/05/image-35.png)
13.Thinning the leather
This stage involves a major task of adjusting the thickness of the already dried leather. According to the customer’s requirements, a large thinning machine is used to process the leather’s thickness, and you can also take this opportunity to check whether the leather meets the customer’s requirements. In the picture, the thinning is used as pigskin for the lining of shoes. Normally, overly thin bed leather (two-layer leather) cannot be sold as a product, but Tochigi Leather Company cleverly uses the bed leather after dyeing it as a padding leather. The image on the right shows an instrument measuring leather thickness, but for professional leather craftsmen, just a pinching by hand reveals how thick the leather is.
![Image [14]-Veg-tan Process Explained: How Rawhide Becomes Thick, Durable Leather Using Natural Tannins in a 21-Step Journey from Rawhide to Finished Product-Nleather](/wp-content/uploads/2026/05/image-36.png)
14.Repeat tanning and dyeing
The leather is placed back into the drum and lipids are added to make the leather softer and dyed to the desired color. Depending on the intended use, tanning can be done again. Although the chemicals added may affect the expected color, the dyeing time is generally about 6~8 hours. Additionally, strict checks must be made to check for uneven color patches on the leather. This step lays the foundation for the leather material; whether making belts or bags, it can create different leather styles tailored to different uses. From the very beginning to this step, it has already taken two months.
![Image [15]-Veg-tan Process Explained: How Rawhide Becomes Thick, Durable Leather Using Natural Tannins in a 21-Step Journey from Rawhide to Finished Product-Nleather](/wp-content/uploads/2026/05/image-37.png)
15.Extension
After the secondary tanning and dyeing are complete, the extender can be used again to perform the initial stretching of the leather. Once the leather absorbs moisture, it shrinks inward, so the extender can both stretch the leather and remove excess moisture.
![Image [16]-Veg-tan Process Explained: How Rawhide Becomes Thick, Durable Leather Using Natural Tannins in a 21-Step Journey from Rawhide to Finished Product-Nleather](/wp-content/uploads/2026/05/image-38.png)
16.Deodorization
The drying process is the same as after the first grease: hang the leather to dry in the shade until it is half dry. When stretching and drying the leather, be careful and attentive.
![Image [17]-Veg-tan Process Explained: How Rawhide Becomes Thick, Durable Leather Using Natural Tannins in a 21-Step Journey from Rawhide to Finished Product-Nleather](/wp-content/uploads/2026/05/image-39.png)
17.Manual extension
If you need to work with thicker or harder leather to stretch, you can use a portable machine called a ‘handheld extender’ to stretch the leather by hand. Since each piece of leather requires experts to stretch by hand, although the price is higher, the surface color and workmanship of the leather are noticeably different from regular leather. If the leather curls after drying, this method can also be used to stretch the leather. Since the handheld extender weighs up to 20kg, it requires flexible use, which requires considerable physical strength and experience.
![Image [18]-Veg-tan Process Explained: How Rawhide Becomes Thick, Durable Leather Using Natural Tannins in a 21-Step Journey from Rawhide to Finished Product-Nleather](/wp-content/uploads/2026/05/image-40.png)
18.Deodorize and dry
After 1~2 days, the moisture can dry completely. Because natural drying is used, even if the weather is good, poor ventilation means the moisture cannot dry completely. Thicker leather takes about a week, and thinner leather about 4 days to dry thoroughly. If only machine-stretched leather is used, the front end will curl like a squid after drying.
19.Peel the skin
Placing the curled leather into a vibrator can make dry, stiff leather soft again. Depending on the leather’s use, different machines can also be used.
![Image [19]-Veg-tan Process Explained: How Rawhide Becomes Thick, Durable Leather Using Natural Tannins in a 21-Step Journey from Rawhide to Finished Product-Nleather](/wp-content/uploads/2026/05/image-41.png)
20. Painting and dyeing
To give the leather a beautiful color and shine, you can apply a coating to the leather and add some makeup. To achieve the desired color for the leather, depending on the product, you can add leather gloss varnish or leather acrylic lotion.
![Image [20]-Veg-tan Process Explained: How Rawhide Becomes Thick, Durable Leather Using Natural Tannins in a 21-Step Journey from Rawhide to Finished Product-Nleather](/wp-content/uploads/2026/05/image-43.png)
Leather acrylic emulsion takes 1 day, while gloss paint takes 2 hours to dry. After finishing the painting process, you can start finishing with a polishing machine or automatic sprayer. You can also use ironing to give the leather a glossy finish.
21.Quality inspection, measurement, and shipping
In well-lit areas, carefully check the leather for any wounds or stains, and whether the color appears as expected. Next, a photoelectric meter is used to measure the leather area (DS).
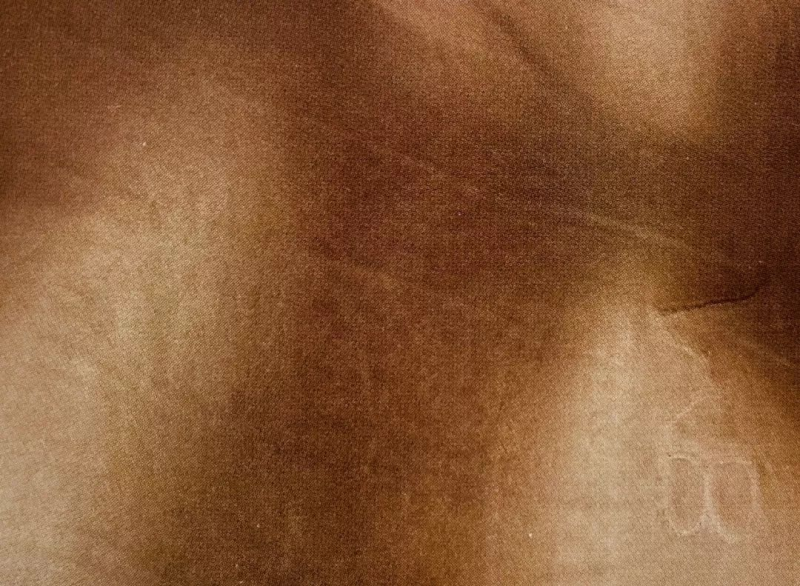
Some owners engrave the first letter of their owner on the leather to represent the brand; while others have tiger-striped patterns, and these features attached to the original hide can be considered a kind of leather charm. Nowadays, some owners use heart-shaped or star-shaped embellishments to represent their brand, so many people especially want this type of leather. Finally, after carefully packaging the leather, it’s ready to ship.
![Image [21]-Veg-tan Process Explained: How Rawhide Becomes Thick, Durable Leather Using Natural Tannins in a 21-Step Journey from Rawhide to Finished Product-Nleather](/wp-content/uploads/2026/05/image-44.png)

No comments yet